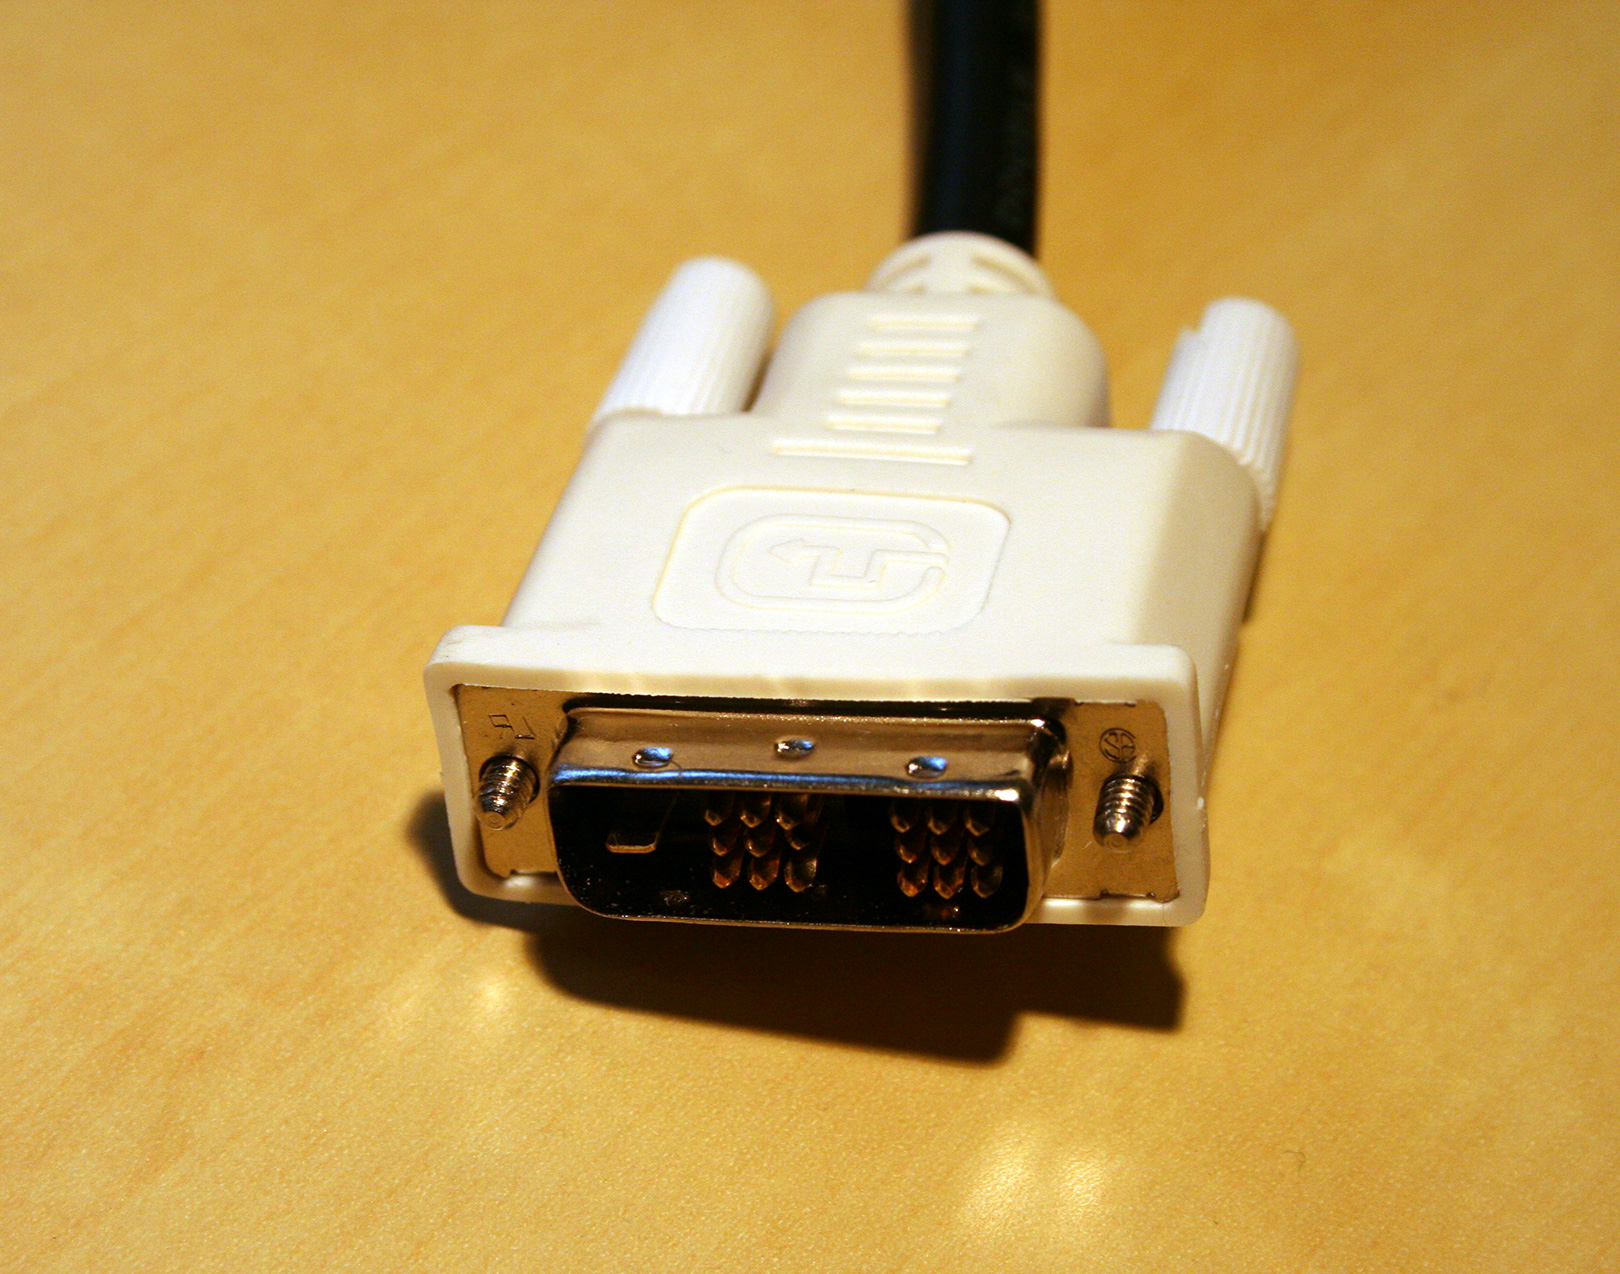
Update (2/24/2009): Since writing this rant a little over a year ago, Apple has finally adopted a new technology, though not HDMI, which I was hoping for. Apple has implemented this new MiniDisplay port into it's new line of laptops (as well as their NEW Cinema Display which I ranted about in the original post) and says that they plan on implementing the new Mini DisplayPort into their entire line of Macs soon. It's nice to see that Apple finally adopted a new technology over the aging DVI spec. The new Mini DisplayPort supports higher bandwidth, than DVI and HDMI though it does lack the convenience of having both the audio and video in one connection like HDMI. Though the more I think about this "convenience" the more I think it might not have been so convenient. For example, yes for TVs and Home Theater applications, HDMI is incredibly convenient. Both audio and video over one cable is both elegant and easy for your average consumer to hook-up. However, I mostly use a set of 2.1 or 5.1 speakers combined with my computer setups and having the audio and video streamed to my monitor may just add another bit of confusion into the setup, and that is how to get the audio then from the monitor, to output to the speakers.
Lastly it's nice to know that Apple is continuing it's tradition with adopting industry (and often times open!) standards. According to this Ars Technica post, Apple is offering free licensing for the new Mini DisplayPort spec. This is exciting news and hopefully we'll start seeing some third party cables, adaptors, and monitors that will start integrating the spec!
Original Post (1/30/2008): (As mentioned in earlier posts, one of the greatest parts about Apple is the fact that they are constantly raising the bar when it comes to being the most up-to-date with the latest industry standards. Whether it be AAC, h.264, USB, Firewire, Flat Panels, Bluetooth 2.1, the list goes on. So WHY Apple, WHY have you not implemented HDMI into all of your products yet?! You'd think that, Apple, who's often been criticized for putting form before function, should be all about implementing HDMI. HDMI is a single interface that can carry both High Definition video, as well as 7.1 surround sound audio, all in one tiny package, that is remarkably smaller and sleeker than it's predecessor DVI.
So let's recap here, smaller connection, no screws making it look like an old legacy connection (see: Parallel Port), higher bandwidth, single cable rather than two, it just makes sense to me.
An argument that one could make about part of my last statement could be the move to Mini-DVI and Micro-DVI. If you take a look at Apple's line of computers, the iMac, Macbook (though not Pro) and Macbook Air all incorporate a physically smaller connection than your regular old DVI connection. These models incorporate Mini-DVI (iMac and Macbook) and the newly announced "Micro-DVI" (Macbook Air). While this is a nice attempt at making DVI small and pretty, (and thank god it loses those screws!) this is still a pretty crappy solution since this means shelling out an extra $20 bucks for an adaptor. Some might say that these interfaces are proprietary, I don't know if I'd go as far as to say that much, but they definitely do seem to only be found on Apple computers (which I guess you could say is essentially proprietary). So c'mon Apple, what happened to industry "standards."
Another argument that some people say is that this might cannibalize or discourage sales of apple's own AppleTV, since the new Front Row 2.0 resembles and functions very similar to that of the first generation AppleTV (generation that existed during the release of Leopard). But I think that now Apple has released AppleTV "take 2," which offers a lot of new functionality, such as "Computer-Free" downloads, rentals, etc.. This furthers the gap between Front Row 2.0 and AppleTV, and this almost completely destroys this argument.
Lastly, Apple's Cinema Displays are so out-dated it's pretty sickening. Back when I was shopping around for an LCD, back in March of 2006, I lusted for an Apple Cinema Display, but knew that I couldn't afford the hefty price tag. At the time the price for the introductory 20" Cinema Display was I believe $799 but I could be wrong on this. This compared to the Dell 2005fpw which I ultimately ended up with that could be picked up for as low as $500 at the time, the choice was pretty much obvious, considering both displays used the same LG panel inside. I could go on and on explaining why I chose the Dell over the Cinema Display, and I could even write an entire post about my beef with Apple's Displays, but that will have to wait for another time. Anyways, Apple's prices and specs of their displays are outdated. Where's the built in iSight? I'm hoping that sooner rather than later we see a revision to this Cinema Display line and then maybe, just MAYBE this will finally push Apple over the edge and adapt HDMI, if even only just as an option.
Wow that ended up being a little longer than I had expected.
Wednesday, January 30, 2008

Friday, January 18, 2008
Macworld 2008 Recapped.
Well Macworld 2008 came and went, and overall I was pretty satisfied with everything announced. I was extremely happy to see that 2 or 3 of my hopes/predictions did end up coming true!
-First Solid State Disk Options
I was extremely happy to see that Apple FINALLY introduced Solid State Disk as an option when configuring the new MacBook Air. Though a little steep price-wise, this is definitely a step in the right direction, and slowly but surely will start to see high capacities, which hopefully will result in price drops. I truly believe that Flash or Solid State Disk's are the future and I recommend going this route if at all possible in any sort of portable device.
-Ultra Portable Macbook
Apple released the Macbook Air on Tuesday, and it looks pretty slick. It's a bit on the pricey side, coming in at $1,799 but I truly believe that this is mostly because of the such small form factor. I love where apple is going with this. Apple's always ahead of the game when adopting and killing off standards; USB and Firewire standard before most PC's even had it, Killing off the Floppy Drive with the translucent iMacs, Bluetooth Standard across the whole Mac line, the list goes on and the Macbook Air is another perfect example. One of the reasons why the Macbook Air is so sleek and tiny is because it's lack of ports. The transition from the iBook to the Macbook, meant killing off the 56k modem, and now Apple has done it again by killing off the Ethernet Port (optional USB adaptor). Once 802.11n is finalized later this year (hopefully!) I don't think people will even miss the Ethernet port.
However there are a few things I do not like about the Macbook Air. For starters, the memory is soldered into the motherboard and therefore can not be upgraded. Again, this is probably just a form factor issue, also this would make the Macbook Air a little less seek. Lastly, the battery is not user-replaceable, so whenever the user is going to want a brand new battery, they'll have to ship it in and pay $129 bucks for a new battery. Thank God there is no cost for labor.
-iPod Touch Updates
Unfortunately there was no updates to the iPod's capacities, but there was an update that is almost equally as exciting. Apple FINALLY updated the Apps available on the iPod Touch (-not iTouch!). Apple has now included the following Apps into the iPod Touch; Mail Client, Google Maps, Stocks, Weather, and Notes. As if I didn't already want an iPod Touch pretty badly this pretty much sealed the deal for me, and I will hopefully be getting one of these as soon as possible.
-Time Capsule
One thing that was a complete surprise to me was the introduction of "Time Capsule." Time Capsule is essentially a NAS. It is aimed towards users who want to use Time Machine to back up their entire family of Macs wirelessly. I think it's a pretty clever name. It is an Airport Extreme Base Station (Apple's Wireless B,G,N Router) with a "Server Grade" hard drive inside. Personally this was one of the more exciting announcements of the whole entire keynote, since I'm currently in the market for BOTH a new wireless router and an external hard drive. I was quite surprised with the prices as well. The 500GB Time Capsule will cost you $299, and the 1TB model will cost you $499. If you do the math these are pretty good prices considering the Airport Extreme Base Station was $179 prior to the release of Time Capsule. This mean's that they are throwing in an external drive for $120 bucks for the 500GB model and $320 bucks for the 1TB model. Doing a quick search at Amazon shows that this is an amazing deal, not to even mention that it's all integrated into one product!
With Leopard being quite a big success right out of the gate, the iPhone SDK just around the corner, and the latest Mac lineup transformation, I think 2008 will be a pretty exciting year for Apple.
-First Solid State Disk Options
I was extremely happy to see that Apple FINALLY introduced Solid State Disk as an option when configuring the new MacBook Air. Though a little steep price-wise, this is definitely a step in the right direction, and slowly but surely will start to see high capacities, which hopefully will result in price drops. I truly believe that Flash or Solid State Disk's are the future and I recommend going this route if at all possible in any sort of portable device.
-Ultra Portable Macbook
Apple released the Macbook Air on Tuesday, and it looks pretty slick. It's a bit on the pricey side, coming in at $1,799 but I truly believe that this is mostly because of the such small form factor. I love where apple is going with this. Apple's always ahead of the game when adopting and killing off standards; USB and Firewire standard before most PC's even had it, Killing off the Floppy Drive with the translucent iMacs, Bluetooth Standard across the whole Mac line, the list goes on and the Macbook Air is another perfect example. One of the reasons why the Macbook Air is so sleek and tiny is because it's lack of ports. The transition from the iBook to the Macbook, meant killing off the 56k modem, and now Apple has done it again by killing off the Ethernet Port (optional USB adaptor). Once 802.11n is finalized later this year (hopefully!) I don't think people will even miss the Ethernet port.
However there are a few things I do not like about the Macbook Air. For starters, the memory is soldered into the motherboard and therefore can not be upgraded. Again, this is probably just a form factor issue, also this would make the Macbook Air a little less seek. Lastly, the battery is not user-replaceable, so whenever the user is going to want a brand new battery, they'll have to ship it in and pay $129 bucks for a new battery. Thank God there is no cost for labor.
-iPod Touch Updates
Unfortunately there was no updates to the iPod's capacities, but there was an update that is almost equally as exciting. Apple FINALLY updated the Apps available on the iPod Touch (-not iTouch!). Apple has now included the following Apps into the iPod Touch; Mail Client, Google Maps, Stocks, Weather, and Notes. As if I didn't already want an iPod Touch pretty badly this pretty much sealed the deal for me, and I will hopefully be getting one of these as soon as possible.
-Time Capsule
One thing that was a complete surprise to me was the introduction of "Time Capsule." Time Capsule is essentially a NAS. It is aimed towards users who want to use Time Machine to back up their entire family of Macs wirelessly. I think it's a pretty clever name. It is an Airport Extreme Base Station (Apple's Wireless B,G,N Router) with a "Server Grade" hard drive inside. Personally this was one of the more exciting announcements of the whole entire keynote, since I'm currently in the market for BOTH a new wireless router and an external hard drive. I was quite surprised with the prices as well. The 500GB Time Capsule will cost you $299, and the 1TB model will cost you $499. If you do the math these are pretty good prices considering the Airport Extreme Base Station was $179 prior to the release of Time Capsule. This mean's that they are throwing in an external drive for $120 bucks for the 500GB model and $320 bucks for the 1TB model. Doing a quick search at Amazon shows that this is an amazing deal, not to even mention that it's all integrated into one product!
With Leopard being quite a big success right out of the gate, the iPhone SDK just around the corner, and the latest Mac lineup transformation, I think 2008 will be a pretty exciting year for Apple.
Sunday, January 13, 2008
Allow your Mac to sleep after a DVD has finished playing.
I find it easiest for me to go to sleep while watching something on TV or a DVD. If I'm watching TV, I have a very conveniently located "Sleep Timer" button where I can specify how much time I want the TV to remain on before automatically turning off. I find this great for so many reasons. This saves my Samsung 23" HDTV from possibly getting image burn-in (if say it was left on an annoying, non-animated, or slightly animated DVD menu). This also saves my TV from the possibility of it overheating (and yes flat panels tend to get VERY hot over extended uses). And lastly, plain-and-simple, this is a very energy-saving-friendly feature.
Over break, I've been living back at my Mom's house and have been without my beloved TV. Unfortunately, Apple has created Mac OS X so that the Mac DOES NOT sleep at any time that a DVD is playing. Now this make sense for quite a bit of reasons, it'd be rather annoying to have to switch the power settings whenever you wanted to watch a DVD, or use something like Caffeine. However, it appears that, by default, Mac OS X's DVD Player goes back to the looping DVD Menu (as does most Standalone DVD players) after the episode(s) or movie is over. Since this means that DVD player is still technically "running," OS X does not put the display nor computer to sleep at all.
For obvious reasons, this can both be annoying, and could possibly cause image burn-in, so I searched for a solution! First I wanted to investigate HOW Mac OS X does it's Autmoated Tasks.
Possible solution #1: A "cron" is a time-based scheduling service for Unix based computers. I first heard of crons back in October when many Mac sites released a Mac OS X Trojan Warning. I then planned on learning how to correctly schedule one of these cron jobs to tell my Mac to Quit the DVD Player at a certain time of my choosing. Soon after doing a little more googling I found this little app that had a funny name (CronniX), but after a quick look at the comments, I found out that Apple actually recommends the use of "launchd," saying that it supersedes previous commands such as cron. This led me to possible solution #2.
Possible solution #2: ANOTHER comment found on that Lifehacker post was one that directed me to an app called "Lingon," that simply gives you a GUI to help you create these "launchd's." Anxious and excited, I quickly downloaded this and ran it. I was a little scared and overwhelmed since this app showed you the tons and tons of system related launchd's that had been previously set. I was scared that I was going to mess something up, and thought this was a little bit overkill just to do something as simple as closing DVD Player at a specified time. However I'll definitely keep this app in mind, when the day comes that I DO want to mess around with some more powerful automated tasks.
Possible solution #3: A little more googling around led me to a way of scheduling an automated task by using iCal, creating an event, and then setting an alarm for that event. You can then set the alarm to do one of multiple things; prompt you a message, message with sound, email, open a file, or run a script. I was pretty excited about this! This would be much easier to configure quickly, and it wouldn't be dealing with such important core files, just to schedule DVD player to turn off. So I created a quick little Automator Workflow App (save as... Application) that simply "Stopped the DVD Player." Tested it out, and it worked perfectly! This was great and I was excited to finally have closure on this problem that had long annoyed me!
Possible solution #4: While ranting on to my friend Dave about how ridiculous I thought it was that I had to go to all this work just to get my Mac to sleep after watching a DVD he sent me a URL to an app he found in about 2 seconds. iSleep was EXACTLY what I needed. It was simple a Mac Sleep Timer and Alarm clock. The app allows you to fall asleep listening to music in iTunes, or watching a DVD, and then after a certain amount of time, will sleep your Mac. I was all excited, and was so close to downloading until I noticed one thing... it said that iSleep was shareware, and that you are allowed to try it for 30-days, and then if you like it, you can register it for about $9 USD. This isn't a bad price, but I absolutely despise shareware. It reminds me of those crappy trials often found on Windows. Whether or not iSleep FORCES you to register or if it pulls a "WinRAR" and just pops up an annoying "Register Me!" window that can simply be exited out of, I wasn't sure. However, the fact that iSleep was shareware was a huge turn off for me.
Possible solution #5: I had about had it, I googled one last time, in hopes that I'd find something new. Sure enough I did. In this thread, posted just a few days ago, someone asked this exact question that has been bugging me for quite some time. I read the responses and discovered the easiest solution yet. A million kudos goes out to "Jory," who states that Tiger (or later) contains a Sleep Timer (Command + T) that allows you to; Quit DVD Player, Sleep, Shut Down, or Log Out at either a specified time, OR (and this is the best part yet) at the end of the current title. Tested it out, and sure enough, works perfectly!
Sometime's it's funny how you'll go to such great depths to find an app or a way to do something, when Apple has already thought it out and included it in their Operating System.
Over break, I've been living back at my Mom's house and have been without my beloved TV. Unfortunately, Apple has created Mac OS X so that the Mac DOES NOT sleep at any time that a DVD is playing. Now this make sense for quite a bit of reasons, it'd be rather annoying to have to switch the power settings whenever you wanted to watch a DVD, or use something like Caffeine. However, it appears that, by default, Mac OS X's DVD Player goes back to the looping DVD Menu (as does most Standalone DVD players) after the episode(s) or movie is over. Since this means that DVD player is still technically "running," OS X does not put the display nor computer to sleep at all.
For obvious reasons, this can both be annoying, and could possibly cause image burn-in, so I searched for a solution! First I wanted to investigate HOW Mac OS X does it's Autmoated Tasks.
Possible solution #1: A "cron" is a time-based scheduling service for Unix based computers. I first heard of crons back in October when many Mac sites released a Mac OS X Trojan Warning. I then planned on learning how to correctly schedule one of these cron jobs to tell my Mac to Quit the DVD Player at a certain time of my choosing. Soon after doing a little more googling I found this little app that had a funny name (CronniX), but after a quick look at the comments, I found out that Apple actually recommends the use of "launchd," saying that it supersedes previous commands such as cron. This led me to possible solution #2.
Possible solution #2: ANOTHER comment found on that Lifehacker post was one that directed me to an app called "Lingon," that simply gives you a GUI to help you create these "launchd's." Anxious and excited, I quickly downloaded this and ran it. I was a little scared and overwhelmed since this app showed you the tons and tons of system related launchd's that had been previously set. I was scared that I was going to mess something up, and thought this was a little bit overkill just to do something as simple as closing DVD Player at a specified time. However I'll definitely keep this app in mind, when the day comes that I DO want to mess around with some more powerful automated tasks.
Possible solution #3: A little more googling around led me to a way of scheduling an automated task by using iCal, creating an event, and then setting an alarm for that event. You can then set the alarm to do one of multiple things; prompt you a message, message with sound, email, open a file, or run a script. I was pretty excited about this! This would be much easier to configure quickly, and it wouldn't be dealing with such important core files, just to schedule DVD player to turn off. So I created a quick little Automator Workflow App (save as... Application) that simply "Stopped the DVD Player." Tested it out, and it worked perfectly! This was great and I was excited to finally have closure on this problem that had long annoyed me!
Possible solution #4: While ranting on to my friend Dave about how ridiculous I thought it was that I had to go to all this work just to get my Mac to sleep after watching a DVD he sent me a URL to an app he found in about 2 seconds. iSleep was EXACTLY what I needed. It was simple a Mac Sleep Timer and Alarm clock. The app allows you to fall asleep listening to music in iTunes, or watching a DVD, and then after a certain amount of time, will sleep your Mac. I was all excited, and was so close to downloading until I noticed one thing... it said that iSleep was shareware, and that you are allowed to try it for 30-days, and then if you like it, you can register it for about $9 USD. This isn't a bad price, but I absolutely despise shareware. It reminds me of those crappy trials often found on Windows. Whether or not iSleep FORCES you to register or if it pulls a "WinRAR" and just pops up an annoying "Register Me!" window that can simply be exited out of, I wasn't sure. However, the fact that iSleep was shareware was a huge turn off for me.
Possible solution #5: I had about had it, I googled one last time, in hopes that I'd find something new. Sure enough I did. In this thread, posted just a few days ago, someone asked this exact question that has been bugging me for quite some time. I read the responses and discovered the easiest solution yet. A million kudos goes out to "Jory," who states that Tiger (or later) contains a Sleep Timer (Command + T) that allows you to; Quit DVD Player, Sleep, Shut Down, or Log Out at either a specified time, OR (and this is the best part yet) at the end of the current title. Tested it out, and sure enough, works perfectly!
Sometime's it's funny how you'll go to such great depths to find an app or a way to do something, when Apple has already thought it out and included it in their Operating System.
Wednesday, January 9, 2008
Modifying Terminal's Prompt String, Revisited.
Soon after modifying my prompt string in Terminal, I wasn't too happy about the excessive length that this added to each Terminal Prompt. I also didn't like how it wasn't exactly 100% consistent with the look of Tiger's Terminal. So after a few days I decided to go back to the post that I originally saw this tip from and actually read it a bit more thoroughly this time.
After taking a glance at the table of environment variables, I quickly constructed a string, that I believe is identical to the prompt string that appears in Tiger.
The only thing that I am a bit confused with is the double "\\" near the end of the string and the use of double quotes. Some examples on the blog post use double quotes, whereas some use just single quotes. I'm assuming that these are interchangeable.
Another one I like, is even shorter, and I'll probably be switching in between these two depending on what I'm working on.
After taking a glance at the table of environment variables, I quickly constructed a string, that I believe is identical to the prompt string that appears in Tiger.
export PS1="\h:\w \u\\$ "The only thing that I am a bit confused with is the double "\\" near the end of the string and the use of double quotes. Some examples on the blog post use double quotes, whereas some use just single quotes. I'm assuming that these are interchangeable.
Another one I like, is even shorter, and I'll probably be switching in between these two depending on what I'm working on.
export PS1="\h:\w\\$ "
Add a "Message Of The Day" to Terminal.
This one is super simple and can be done in both Tiger and Leopard. I was curious how to do this because I wanted to add the "Welcome to Darwin!" that I missed so much from Tiger's Terminal.
To add a Message of the Day:
1.) Open Terminal and enter the following command.
Since we are not logged into the Root User, we have to precede the command with a sudo, this then prompts you, asking for your administrative password.
(Also Note: that you can use any editor of your choice, now that I know a few of the shortcuts for vim, it is starting to grow on me. "Nano" is also a very easy Text Editor, and the shortcuts are all displayed at the bottom of the screen for your convenience.)
2.) Once you have entered vim, press "
3.) Push
4.) Now close and re-open Terminal and you'll now see your new Message of the Day!
To add a Message of the Day:
1.) Open Terminal and enter the following command.
sudo vim /etc/motdSince we are not logged into the Root User, we have to precede the command with a sudo, this then prompts you, asking for your administrative password.
(Also Note: that you can use any editor of your choice, now that I know a few of the shortcuts for vim, it is starting to grow on me. "Nano" is also a very easy Text Editor, and the shortcuts are all displayed at the bottom of the screen for your convenience.)
2.) Once you have entered vim, press "
i" to enter the "Input mode" and type whatever you'd like for your message of the day. Example: "Welcome to Darwin!"3.) Push
Esc to exit out of "Input mode" and type: ":wq" (explained in this post) to save the file.4.) Now close and re-open Terminal and you'll now see your new Message of the Day!
Tuesday, January 8, 2008
Shred a Hard Drive with Linux.
Windows does have a handy hard drive formatter built into it's OS, but chances are it only does one pass of "Zeros." Also this built in formatter is pointless if it's your boot disk that you want to erase. This is where Linux Live (bootable) CD/DVDs become extremely helpful.
Knoppix was the first Live Linux Distribution (Live meaning you can boot and run Linux right from the CD or DVD) that I knew of, but now it seems that almost ALL major Linux Distro's have some sort of Live CD feature. This tip should work on all Linux distro's (such as Ubuntu and so on) but I've only tested it on Knoppix.
At work we do a lot of shredding of our hard drives in order to dispose of sensitive data, and it's incredibly easy using a Live Linux CD.
First off, I'd just like to make a note that this will delete ALL your data, so use at your own risk.
1.) Acquire the latest Knoppix or Ubuntu.
2.) Boot the computer that you want to shred (completely erase) the hard drive of. To avoid confusion, I recommend to have ONLY the hard drive that you want to shred installed. However this is not required, whereas you can invoke several commands to figure out which hard drive is which.
3.) Once you have booted into the Live CD/DVD, open Terminal.
4.) Enter the following commands:
The first command lets you become the Root User, or "Super User," and gives you permissions to do commands, such as fdisk and shred. The second command will list all of the hard drives currently mounted.
If you followed my recommendation and have only one hard drive installed, you should only see either "Disk /dev/hda" or "Disk /dev/sda" (hda for the old ATA drives, and sda given to newer SATA drives). However if you happened to have multiple hard drives still in your computer, you will see hda and hdb (and so on) AND/OR sda and sdb (and so on). This output is very important to you if you do infact have multiple hard drives installed because this will show you statistics on these hard drives (size, partitions, etc.).
So find out which hard drive you want to shred and continue on to Step 5.
5.) You should still be logged into "Super User," but if not type
6.) Now for the shred command, make sure to type this 100% since this will erase everything.
7.) The command you will need to enter is:
-The -v argument stands for "verbose" and this means that you will be prompted with the progress of the shred.
-The -f argument tells Terminal to force the command.
-The -z argument is telling the shred command to add a final overwrite of all zero's (this means that the hard drive will be completely erased).
-Finally the -n option is there so you can specify the number of iterations that the shred preforms. The more the better... well kind of. All moving parts (hard drives OBVIOUSLY included) have life spans, and making the hard drive do more intensive work, such as shred, logically would limit the life span of the hard drive that much. Most people say 3 to 5 passes are plenty.
-Lastly, make sure to change the
Once completed, you'll be able to format the drive (most OS'es do this automatically for you when installing their OS) and install a fresh copy of an OS of your choice!
Knoppix was the first Live Linux Distribution (Live meaning you can boot and run Linux right from the CD or DVD) that I knew of, but now it seems that almost ALL major Linux Distro's have some sort of Live CD feature. This tip should work on all Linux distro's (such as Ubuntu and so on) but I've only tested it on Knoppix.
At work we do a lot of shredding of our hard drives in order to dispose of sensitive data, and it's incredibly easy using a Live Linux CD.
1.) Acquire the latest Knoppix or Ubuntu.
2.) Boot the computer that you want to shred (completely erase) the hard drive of. To avoid confusion, I recommend to have ONLY the hard drive that you want to shred installed. However this is not required, whereas you can invoke several commands to figure out which hard drive is which.
3.) Once you have booted into the Live CD/DVD, open Terminal.
4.) Enter the following commands:
sufdisk -lThe first command lets you become the Root User, or "Super User," and gives you permissions to do commands, such as fdisk and shred. The second command will list all of the hard drives currently mounted.
If you followed my recommendation and have only one hard drive installed, you should only see either "Disk /dev/hda" or "Disk /dev/sda" (hda for the old ATA drives, and sda given to newer SATA drives). However if you happened to have multiple hard drives still in your computer, you will see hda and hdb (and so on) AND/OR sda and sdb (and so on). This output is very important to you if you do infact have multiple hard drives installed because this will show you statistics on these hard drives (size, partitions, etc.).
So find out which hard drive you want to shred and continue on to Step 5.
5.) You should still be logged into "Super User," but if not type
su (note: this won't hurt if entered a second time).6.) Now for the shred command, make sure to type this 100% since this will erase everything.
7.) The command you will need to enter is:
shred -vfz -n 3 /dev/hda-The -v argument stands for "verbose" and this means that you will be prompted with the progress of the shred.
-The -f argument tells Terminal to force the command.
-The -z argument is telling the shred command to add a final overwrite of all zero's (this means that the hard drive will be completely erased).
-Finally the -n option is there so you can specify the number of iterations that the shred preforms. The more the better... well kind of. All moving parts (hard drives OBVIOUSLY included) have life spans, and making the hard drive do more intensive work, such as shred, logically would limit the life span of the hard drive that much. Most people say 3 to 5 passes are plenty.
-Lastly, make sure to change the
/dev/hda to either (/dev/hda, /dev/hdb, /dev/hdc, /dev/sda, /dev/sdb, /dev/sdc, etc.) to make sense with your situation.Once completed, you'll be able to format the drive (most OS'es do this automatically for you when installing their OS) and install a fresh copy of an OS of your choice!
Spoofing your MAC Address in Tiger.
Spoofing your MAC (Media Access Control) address can be a very handy tool. Most people argue that it is only used for not-so-legit things, but I beg to differ. A very common case where spoofing your MAC address could be both helpful and education is in the area of network trouble-shooting.
Many ISPs (Internet Service Providers) tie the customer's IP address to the MAC address of the computer (or router) connected to the modem. The Physical Layer (Layer 1) is always the first layer that you should check when trouble-shooting a network. This layer includes, modems, routers, computers, cables, etc. So in order to be able to more thoroughly test your network, being able to swap out your current device connected to your modem is key. This can obviously be very tricky when the ISP has locked the IP address to a single MAC address.
Here's where spoofing your MAC address comes extremely handy, and doing it on Mac OS X Tiger, (unfortunately this command does not seem to work in Leopard) and I'm assuming most Linux/UNIX system, is by far the easiest I've ever seen.
1.) Simply open Terminal and type in the following command:
(where aa:bb:cc:dd:ee:ff is the new desired MAC address)
After entering that command, Terminal will ask for your password and now all connected devices connected to the wired ethernet connection should see this new MAC address. And as if this tutorial couldn't get any easier, to revert, simply restart your Mac.
Many ISPs (Internet Service Providers) tie the customer's IP address to the MAC address of the computer (or router) connected to the modem. The Physical Layer (Layer 1) is always the first layer that you should check when trouble-shooting a network. This layer includes, modems, routers, computers, cables, etc. So in order to be able to more thoroughly test your network, being able to swap out your current device connected to your modem is key. This can obviously be very tricky when the ISP has locked the IP address to a single MAC address.
Here's where spoofing your MAC address comes extremely handy, and doing it on Mac OS X Tiger, (unfortunately this command does not seem to work in Leopard) and I'm assuming most Linux/UNIX system, is by far the easiest I've ever seen.
1.) Simply open Terminal and type in the following command:
sudo ifconfig en0 lladdr aa:bb:cc:dd:ee:ff(where aa:bb:cc:dd:ee:ff is the new desired MAC address)
After entering that command, Terminal will ask for your password and now all connected devices connected to the wired ethernet connection should see this new MAC address. And as if this tutorial couldn't get any easier, to revert, simply restart your Mac.
Subscribe to:
Posts (Atom)